
The patterns given here create a warm, comfortable winter hood for both women and toddlers. The shape is appropriate for mid-19th century and a hood is a wonderful thing to have for chilly mornings at Civil War reenactments, or for use in historic settings (or modern, if you dare!) in the colder months of the year.

For practicality, make your hood out of wool for the outer layer. For the lining, choose anything that is slippery - silk, polished cotton, etc. For my boys I used plain cotton to line the hoods with so I could easily clean them. At their age they tend to get everything they wear quite filthy! For the ladies hood I used silk for the lining.


You might also wish to add (and I strongly recommend) an inner layer of insulating fabric (read: wool) or wool batting. This can be quilted just to the lining or may be quilted to both the lining and outer layer like a sandwich.
You will need the following pattern pieces:
Women:
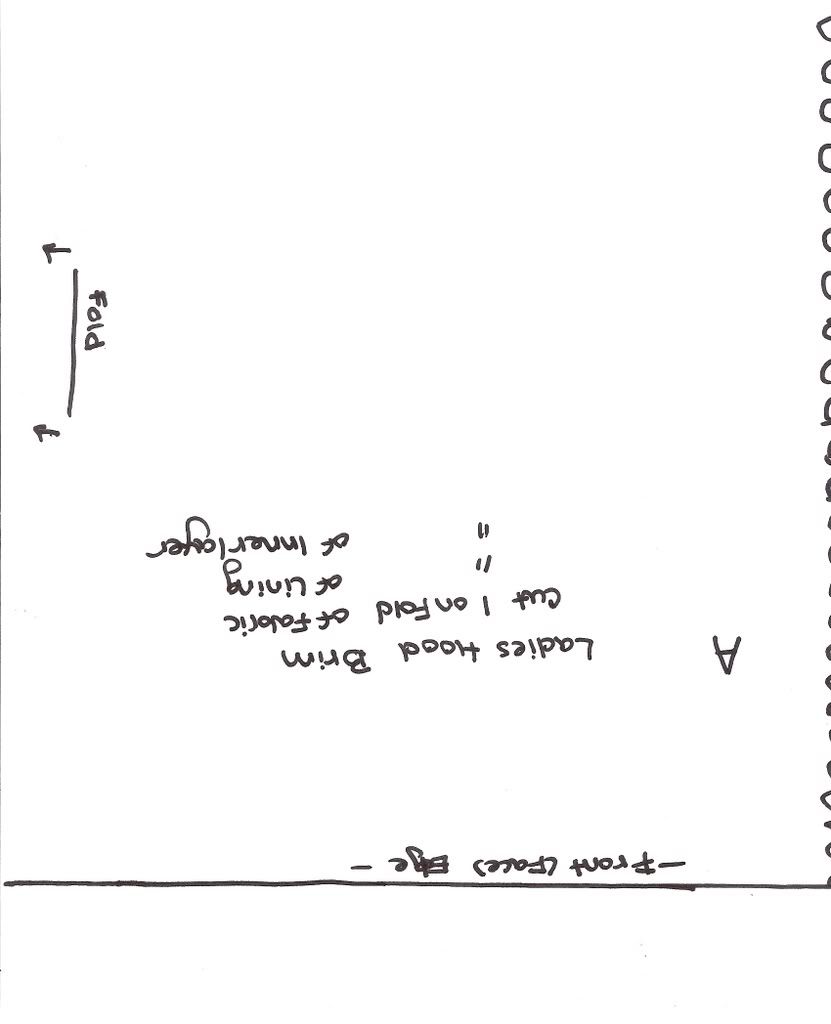
Brim A
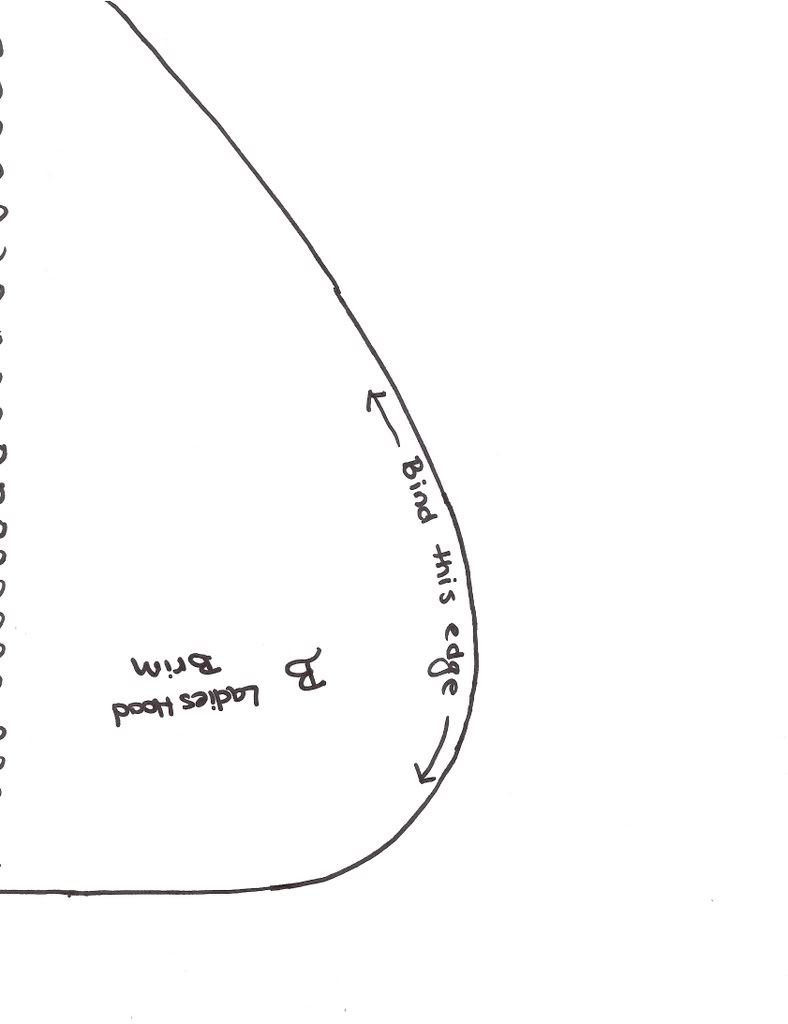
Brim B (tape to A)
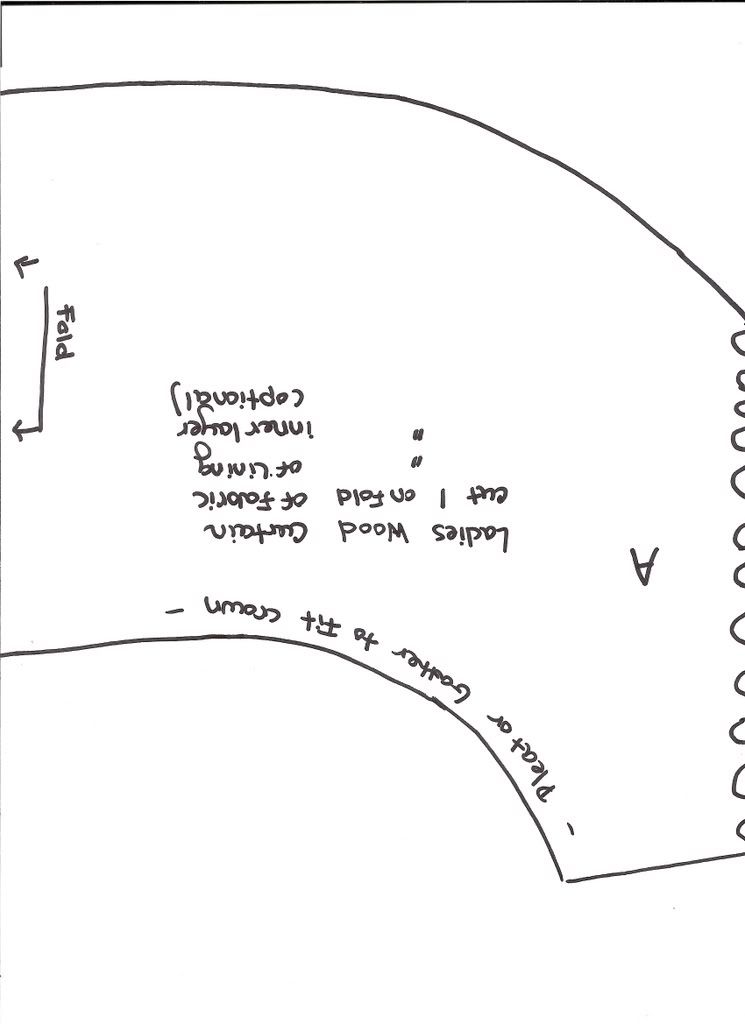
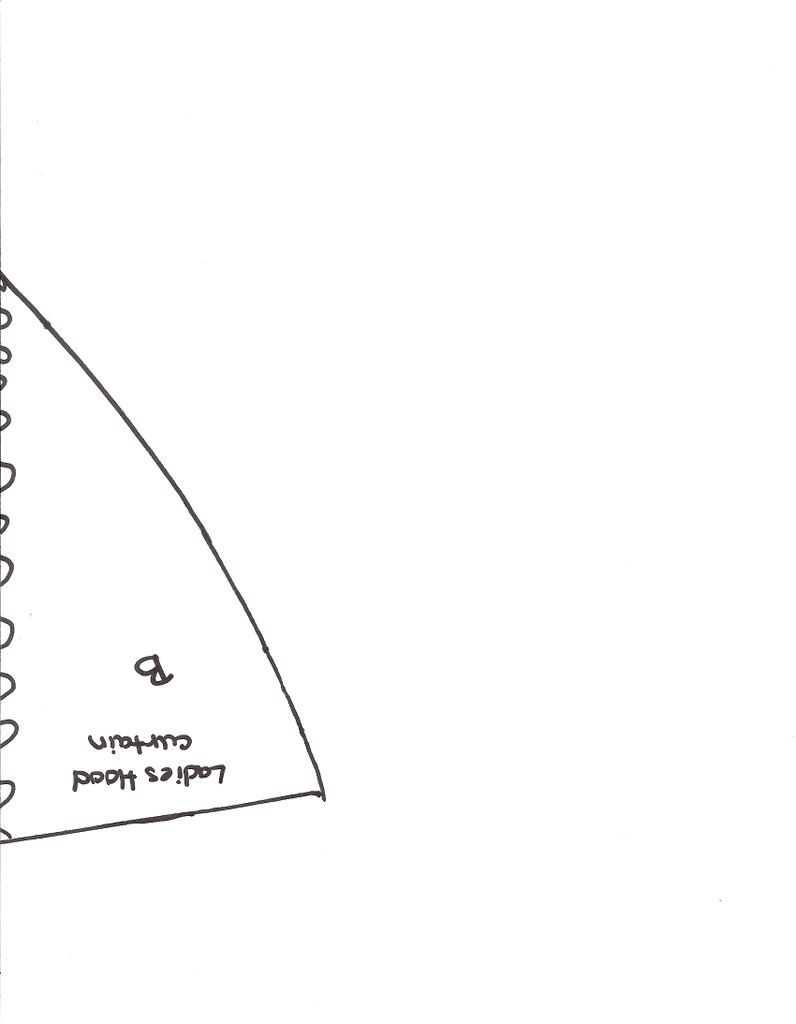
Curtain B (tape to A)
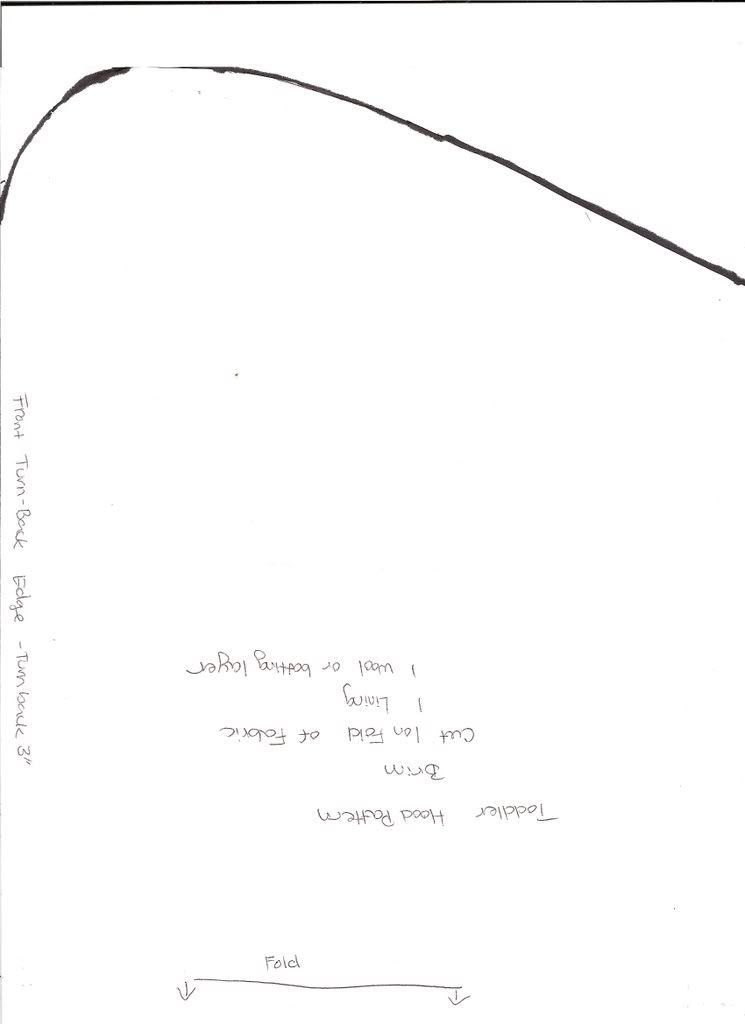
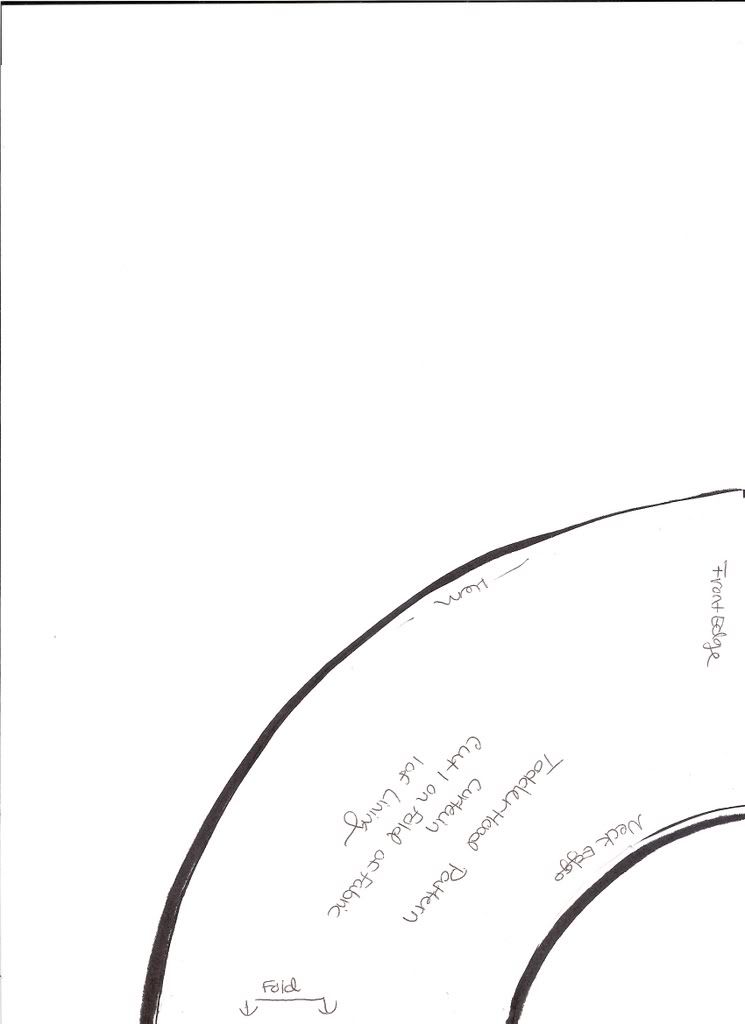
Toddler:
You will also need to reserve some fabric to make ties, if desired. You could also use ribbon for ties if you would rather.
From your fabric cut the following:
Brim - 1 in Fashion Fabric, 1 in Lining, and 1 in Insulating Layer (if you are using wool batting for this layer, also cut an additional lining piece so you can sandwich the wool between the two while quilting. This makes it far easier to quilt and also reduces shedding wool which can creep up between the fibers of your outer layer).
Crown - 1 in Fashion Fabric, 1 in Lining, and 1 in Insulating Layer. If using wool batt, see information as for brim.
Curtain - 1 in Fasion Fabric, 1 in Lining and 1 in Insulating Layer. (if fashion fabric is quite heavy/bulky I usually do not put batting in the curtain. Wool flannel is a good choice to use for the insulating layer here).
Construction:
Brim
For Brim Quilted Through All Layers ~ stack your lining piece, inner piece and fashion fabric piece on top of each other. Make sure the right side of your lining is facing DOWN and the right side of your fashion fabric is facing UP. Baste together. Quilt as desired.
For Brim Quilted Through Bottom Layer Only ~ stack your lining piece, inner piece and additional lining piece on top of each other. Make sure the right side of your bottom lining is facing DOWN. Quilt as desired.
To finish brim, cut strips of binding fabric on the bias to the length needed to go around the face edge of brim and the short, curved edges. Bind.
Crown:
Stack your lining, inner layer and fashion fabric on top of each other. Quilt as for brim above.
Pin crown into brim, matching edges. The crown should ease into the brim with no pleats or easing stitches necessary. If you find you do need pleats or easing stitches, put those in so the crown and brim fit neatly. Stitch with a 1/2" seam allowance. Finish seam with binding.
Curtain:
Lay your fashion fabric and lining right sides together. Stitch with a 1/2" seam allowance along short edges and long, circular curved edge. Trim seam and turn right sides out. Press well.
Pleat the straight edge of your crown to fit the back of your neck comfortably. Pleat the raw edge of the curtain to the same measurement. Pin curtain to crown and stitch with a 1/2" seam allowance. Bind this seam as well.
To finish:
Add ties and decorations as desired!
Enjoy!
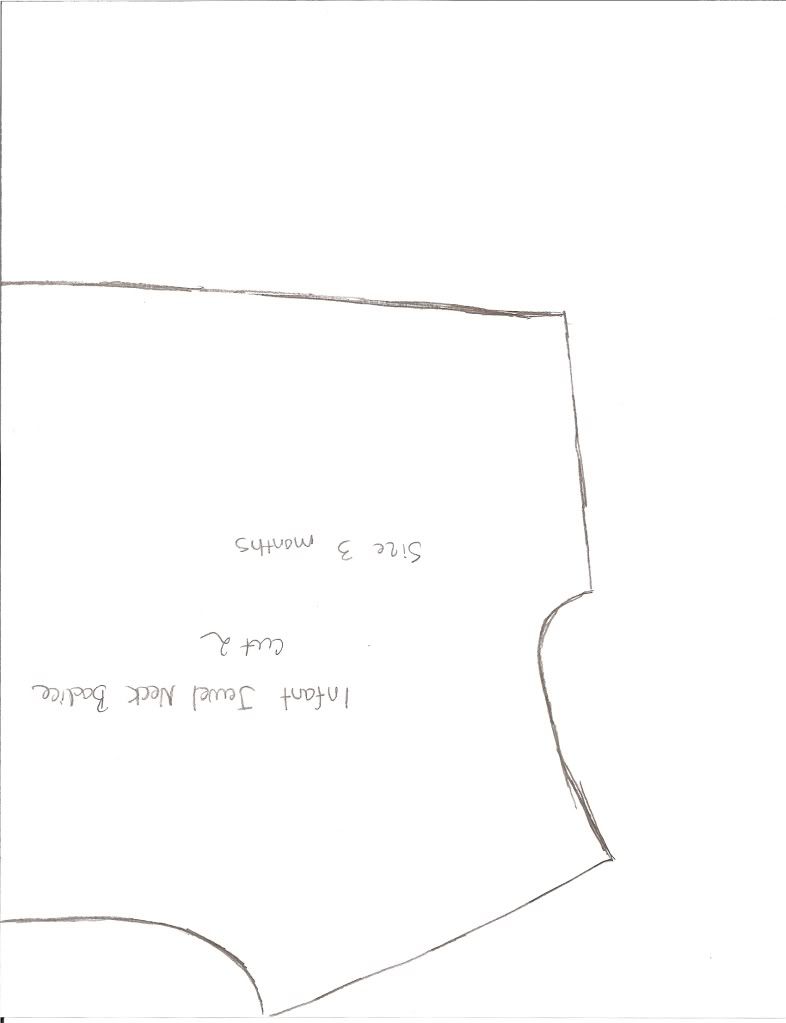
 I give here only the pattern shapes for the bodice and sleeves. The skirt is made of rectangles which you measure and cut to fit your particular baby and style. The skirt can be nearly any length, but for an infant should at least cover the feet. For an older baby cut the skirt to ankle length or above and for toddlers, knee length to mid calf length is ideal. For Malachi's infant dress I made the skirts about 30" long and 60" wide.
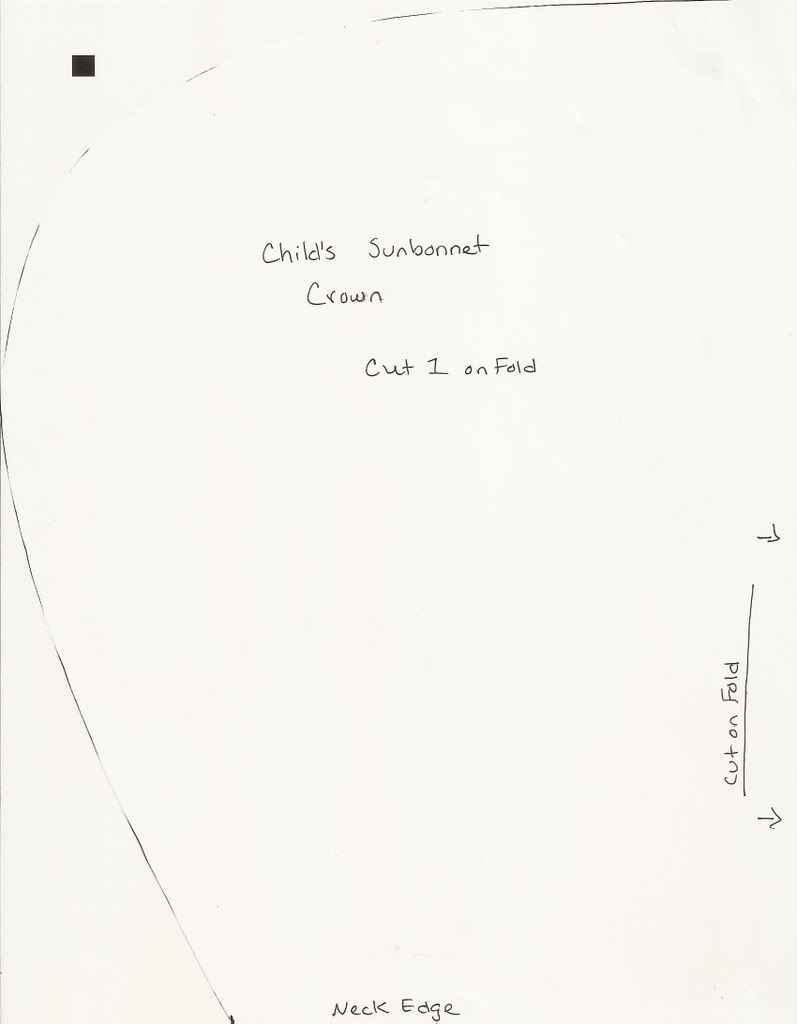
 I made my boys sunbonnets in cotton for coolness. You can use any light cotton. Beware of sheers though - although they are accurate and pretty to use, they do *not* provide good sun protection and it is very easy to get sunburned!

