


For more photos of the finished rompers and the boys wearing them, please visit this link: My 1940's Boys
Here are the pattern pieces I drafted to use for my little sons, in sizes 2T and 6 months. Following are the scans of the pattern pieces and instructions for sewing them. If anything doesn't make sense, please let me know either through the comment section or direct email at david_sarahmeister @ mchsi.com (omit spaces). If you create your own garments from these please let me know how these work for you and share pictures, if you can! :)Love,
Sarah
Romper Bodice, 2T
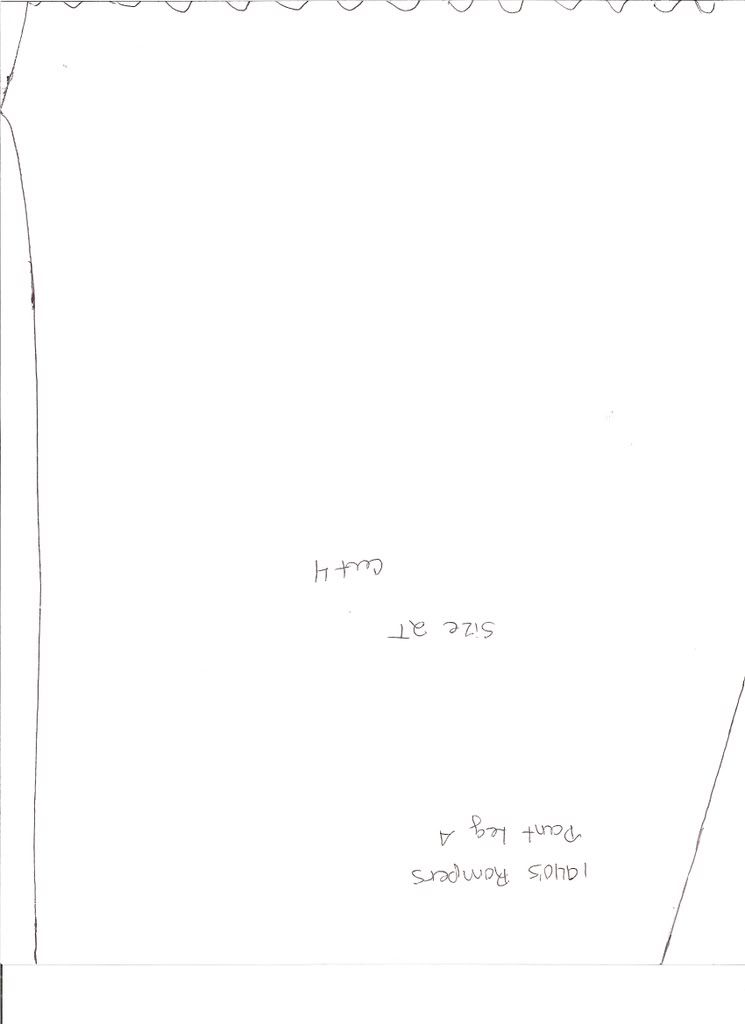
Romper Pant, 2T PIECE A
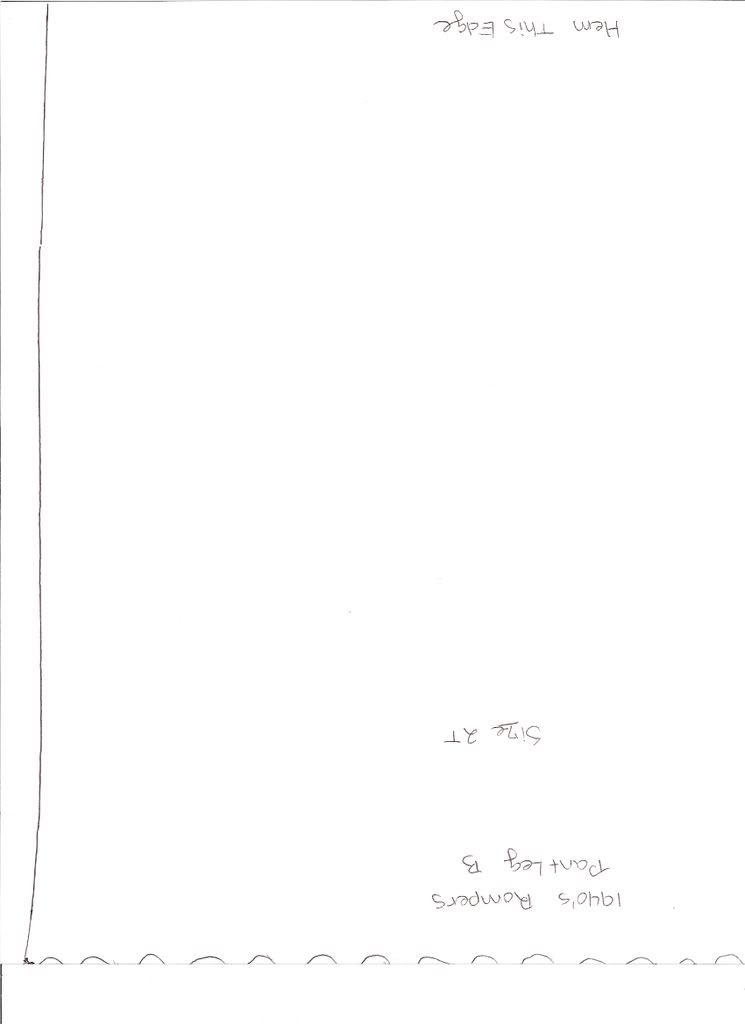
Romper Pant, 2T PIECE B
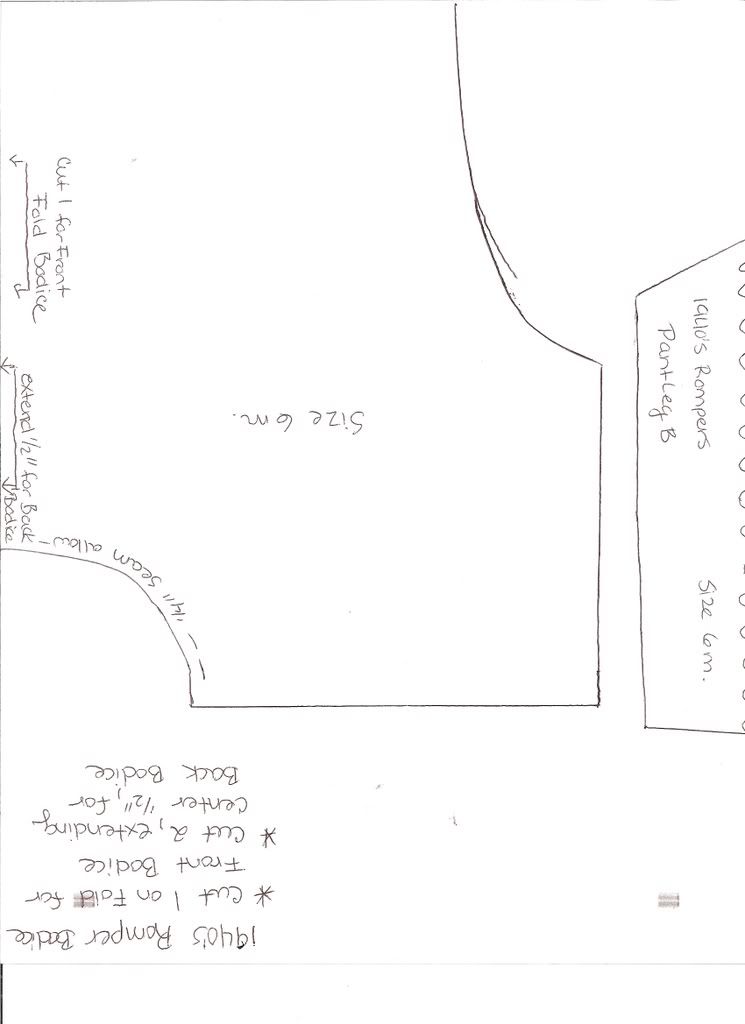
Romper Bodice, 6 months
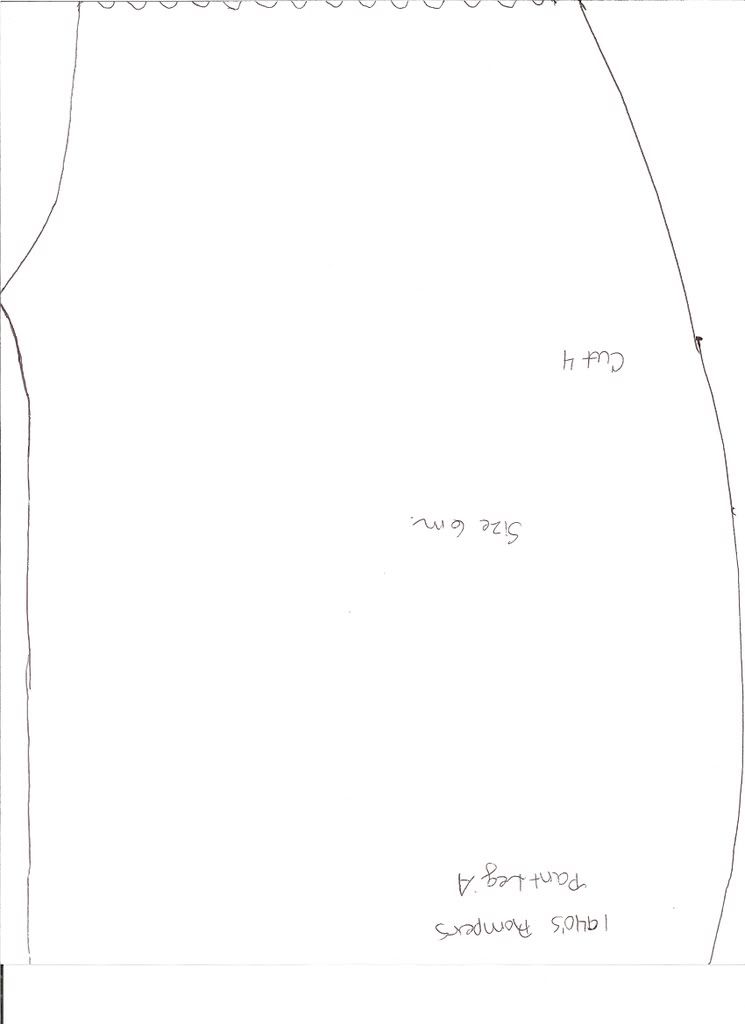
Romper Pant, 6 months
Collars
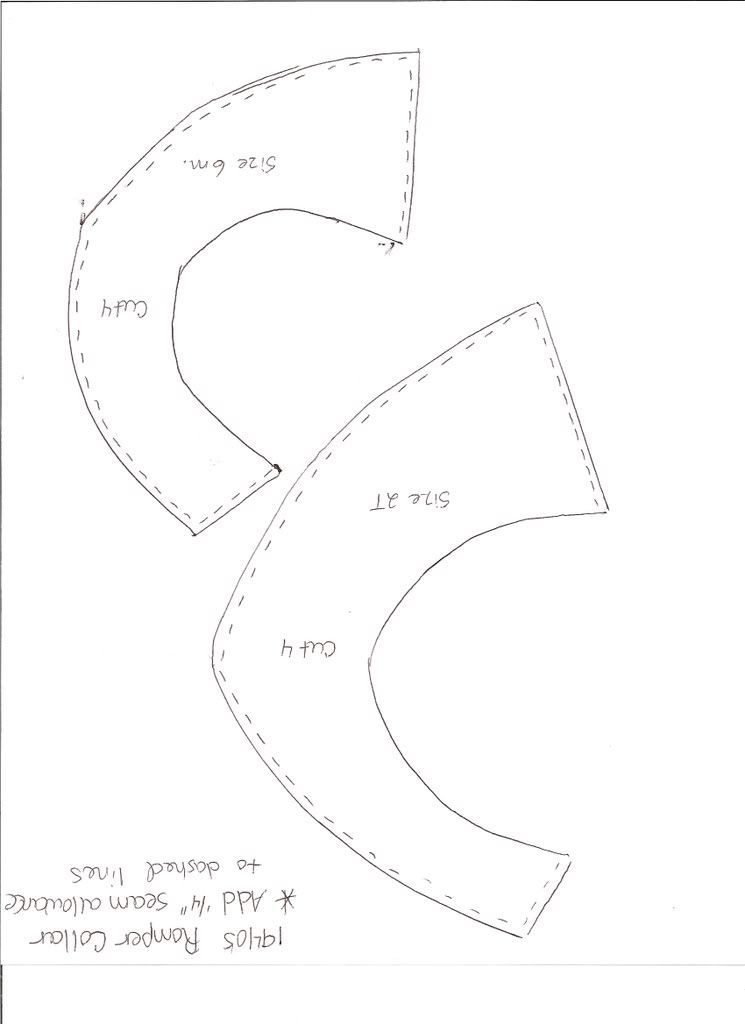
*The pant pieces, both sizes, are composed of two seperate pieces to enable them to fit on standard computer paper. Print out the size you want and tape the two pieces together along the wavy lines to get the correct pattern piece. *
1940’s Romper Assembly Instructions
Prewash and dry all fabric, even if you are recycling an older garment to make this outfit. If recycling, remove all buttons, zippers, trims, etc. and press the material well before cutting out your pieces.
From your fabric, cut out the following:
1 Bodice Front, cut on the fold
2 Bodice Backs, cut with the center line extended ½”
4 Pant Legs
4 Collar Pieces (from coordinating/contrasting fabric)
Reserve some fabric, or scrap fabric in a coordinating/contrasting color, for waistbands and sleeve bands. You will measure and cut these after the garment is assembled. You will also need some scrap fabric for a bias strip to finish off the neckline.
Notions: Thread, six buttons, hook and eye for neck. For 6 m. size, you will need snaps to sew into place for the crutch seam.
Collar:
Lay out your collar pieces, one of top of the other, right sides together. You will make two collar pieces that are mirror images of each other. Pin baste the collar pieces together and sew around short and curved edges, using a ¼” seam allowance. Trim seam, clip curves and turn right sides out. Press and set aside.
Bodice:
Sew Bodice Front and Bodice Back pieces together at the shoulder and side seams. Pin baste into place, and sew, using a ½” seam allowance. Finish seams for smooth interior. (on my rompers, I used French seams but that made puckers in the curved areas, so I had to clip there).
Sew center back seam of bodice, using ½” seam allowance. Stitch from bottom edge of bodice to 4” from top of bodice. Clip to seam at the top of the seam you just stitched. Finish seam below clipped area. Hem the seam allowance to the bodice above the clipped area to finish neckline opening.
Attaching the Collar:
Mark the center front of neckline on bodice. Pin collar to bodice, matching collar at center front. Baste. Cut a 1” wide bias strip the length of your neckline, plus ½”. Pin to neckline, right sides together, sandwiching collar between bodice and bias strip. Stitch, using a ¼” seam allowance. Trim seam, clip curves and press bias strip to inside of bodice. Turn under a ¼” hem on raw edge of bias strip and carefully stitch to bodice neckline, stretching around curved areas where necessary for a smooth fit.
Finishing Bodice:
Sew a hook and eye at back neck opening. If desired, trim bodice with decorative applique.
Finishing the Sleeves:
Measure the circumference of the sleeve opening. Cut two strips of fabric that measurement, plus 1” for seam allowances, 3” wide. Sew strips together along short edges, right sides together. Pin to sleeve opening, right sides together and stitch with a ½” seam allowance. Turn under ½” along free edge of strip and fold up to encase seam allowance, pinning along sewn seam. Slip stitch to secure.
Finishing Bodice:
Press raw edge of bodice hem up ¼” and again ½”. Stitch.
Making the Pants:
Sew each leg by stitching along the outer seam and inseam, right sides together. Finish seam so inside is smooth. Pin legs together along crutch seam, matching inseams. Finish seam. Turn right sides out and press well.
(*for baby pants, hem the legs and leave the crutch seam unsewn and finish by turning under a 1/4" hem to the inside on each pant leg. Lay a piece of bias tape or twill tape along the open crutch seam, covering the turned under hem. Stitch into place, stretching to fit smoothly around curves. Sew snaps to crutch seam to close. Finish the top of the pants by pleating or gathering to fit bodice edge and sew right sides together.)
Making the Waistband:
Measure the circumference of the pant waist. Cut a 3” wide strip of fabric this measurement, plus 1”. Sew together, right sides together, along short ends. Press seam open. Matching waistband seam with center back pant seam, pin waistband to pant waist, right sides together. Sew with a ½” seam allowance. Press under ½” on free edge of waistband strip and turn over to inside of pants, enclosing seam allowance. Slip stitch to seam line to secure.
Making the Hem:
Turn under raw edge of pant hem ¼”. Turn under again 1- 1 ½” (or more, or less, depending on how long you need the pants to be). Stitch into place.
Finishing the Rompers:
Mark 6 buttonholes on trouser waistband, evenly all around. Two in the front, two in the back, and two at each side. Stitch buttonholes. Sew corresponding buttons to hem of bodice. Button the bodice to the trousers.
Enjoy!
2 comments:
Wonderful! Thank you so much for posting this. I didn't expect there to be full instructions so that is even better! God Bless!
Thanks for posting these. I'm setting my next novel in the 1940s and 50s and THIS was exactly the information I needed! You're awesome!
Post a Comment